Select debuff
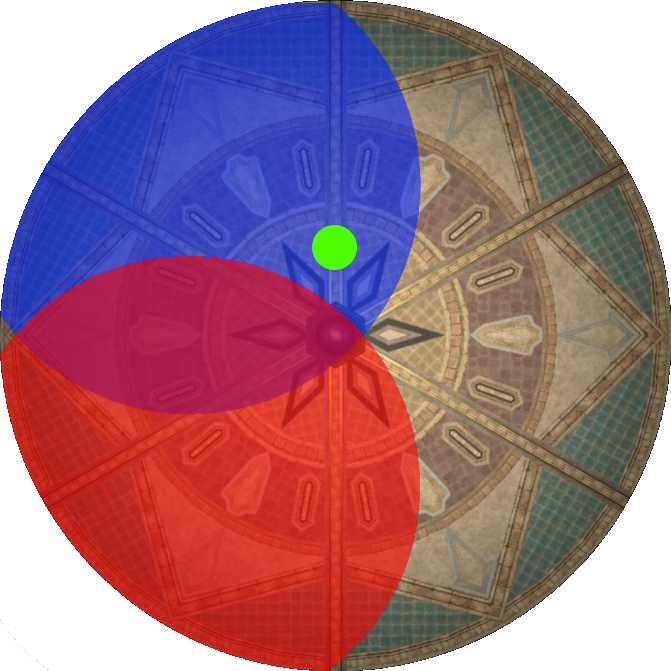
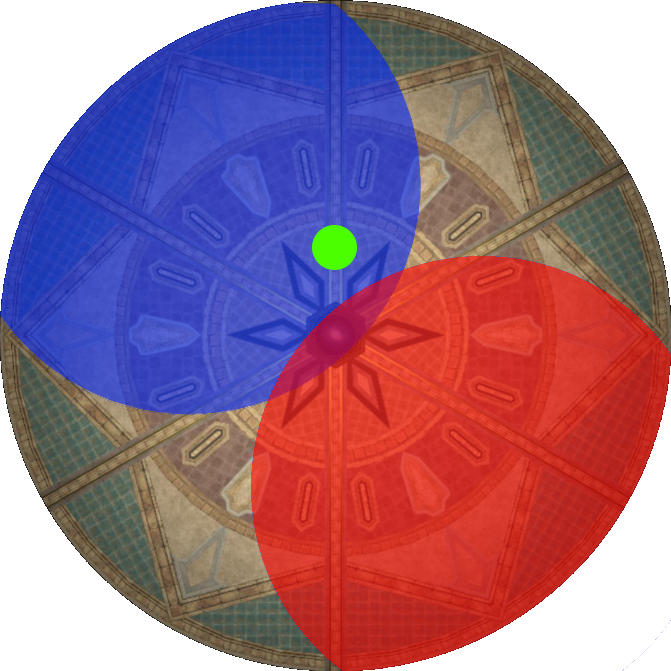
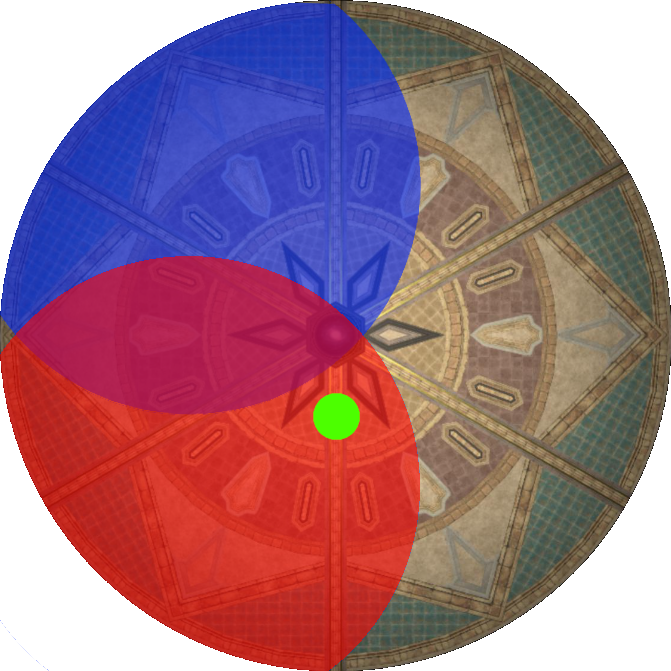
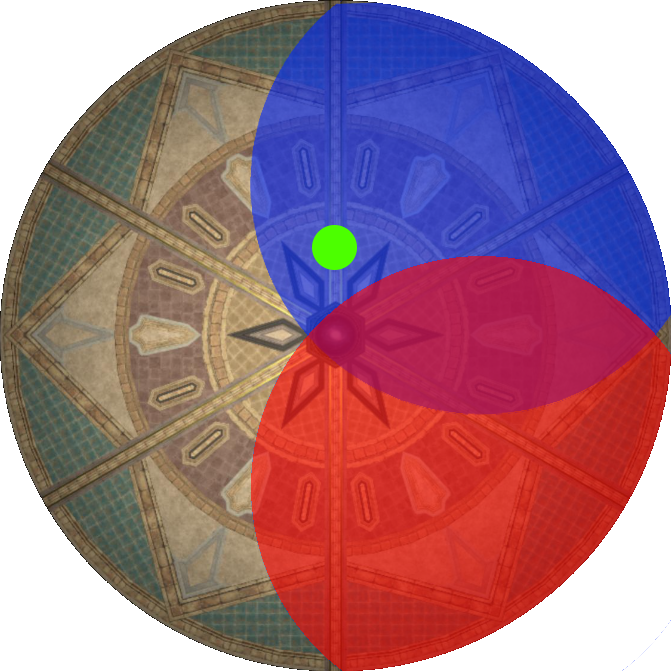
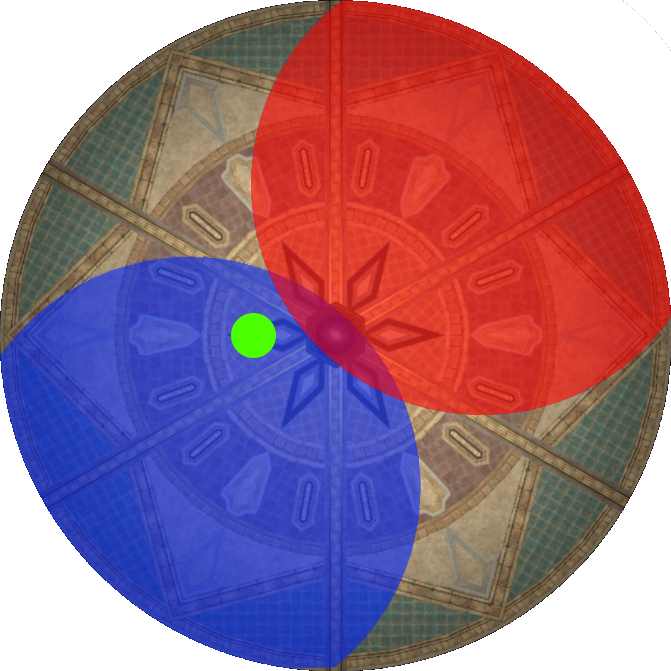
The following table displays where to stand, and the resulting temperature after each jump.
These positions have been optimized to minimize movement allowing DPS uptime.
Recommended distance: Outer edge target hitbox.
| Jump 1 | Jump 2 | Jump 3 | Jump 4 | |
|---|---|---|---|---|
| Visual | 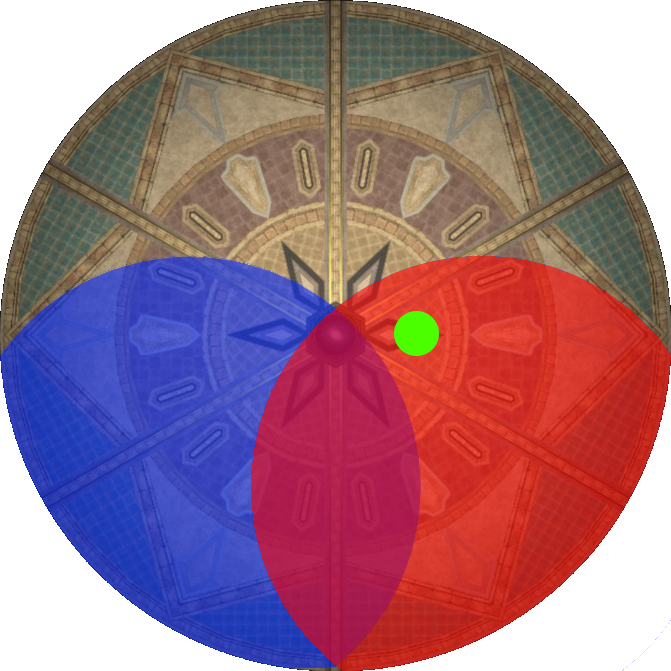 |
 |
 |
 |
| Position | Right | Down | Down | Down |
| Hit by | Fire | Ice | Fire | Nothing |
| Result | Neutral | Ice +1 | Neutral | Neutral |
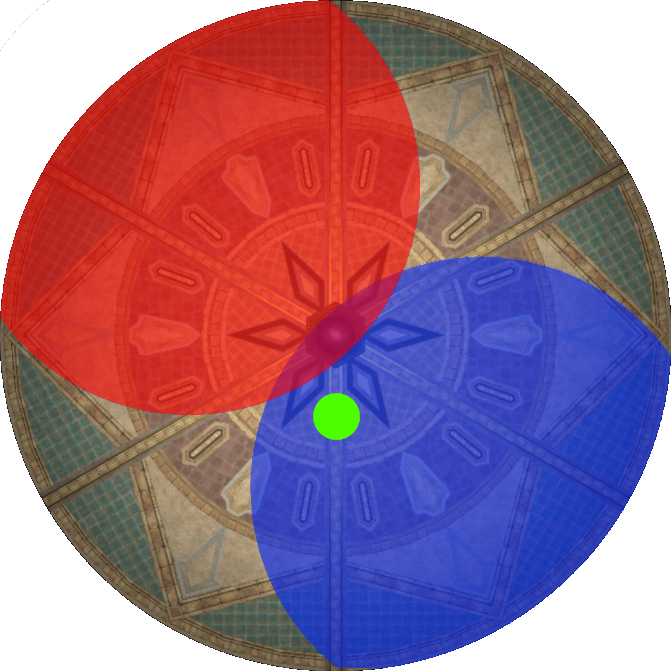
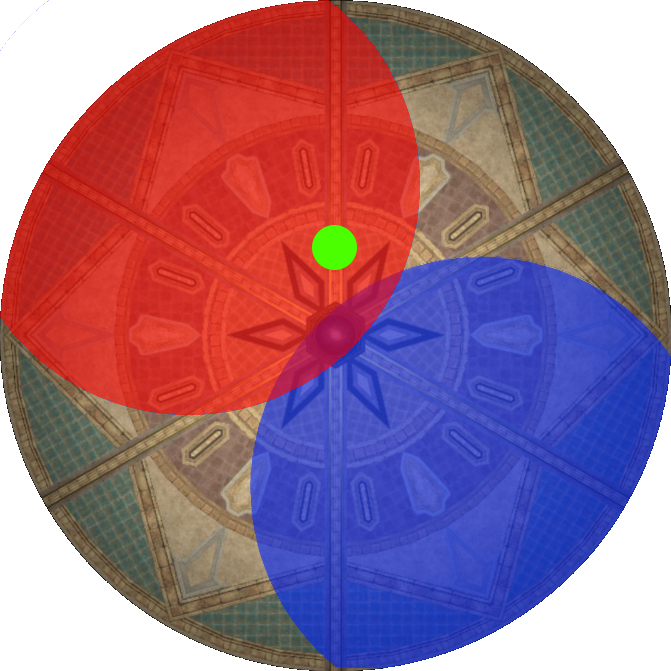
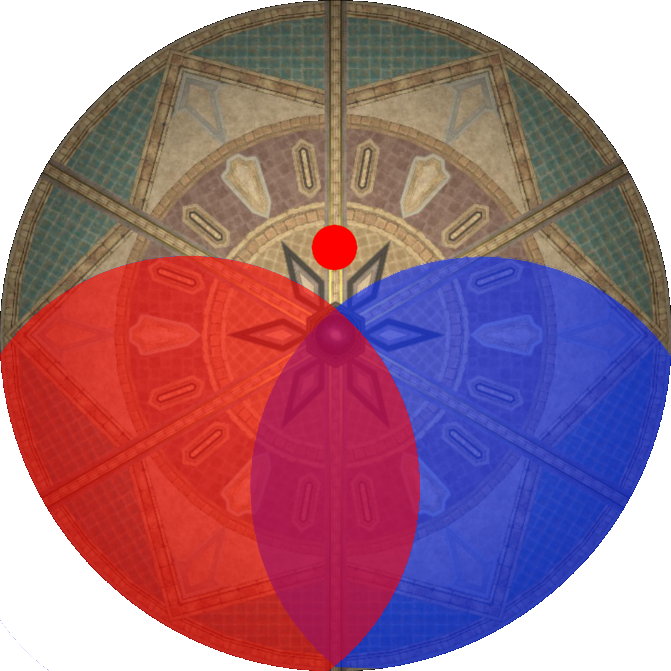
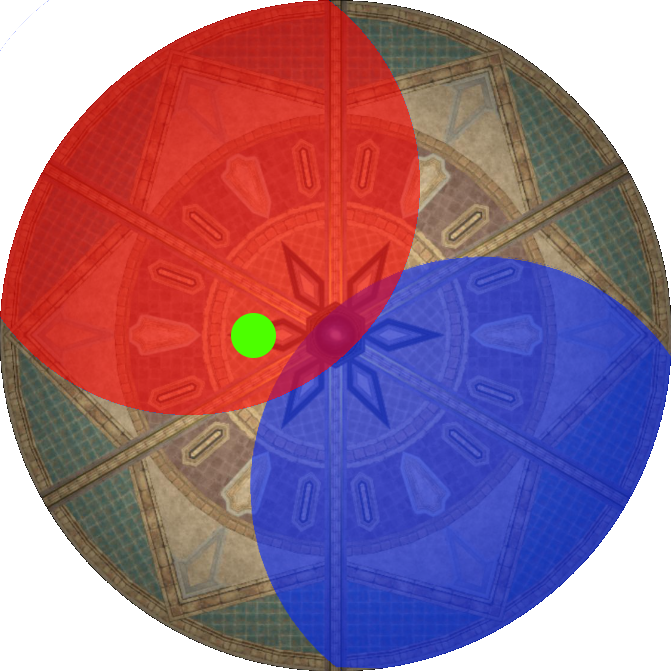
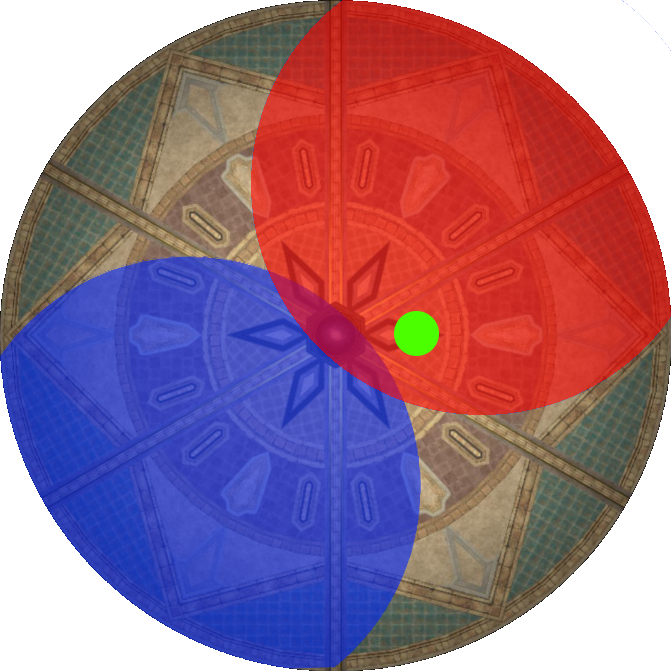
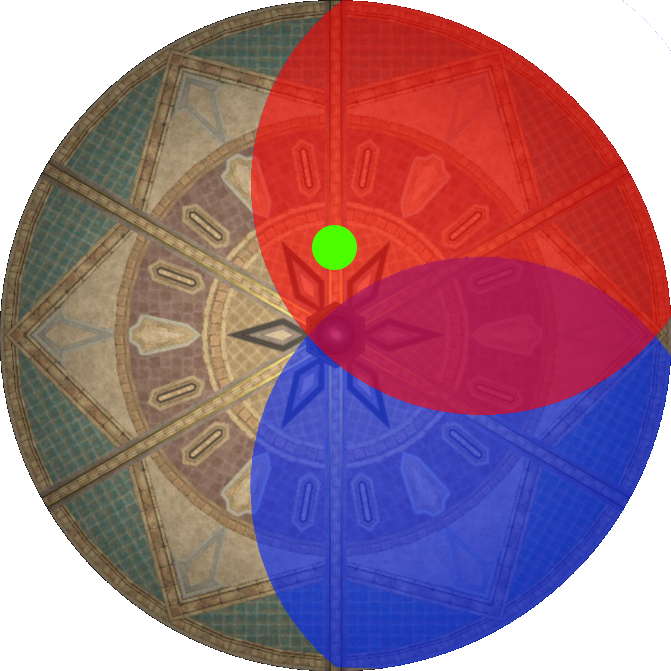
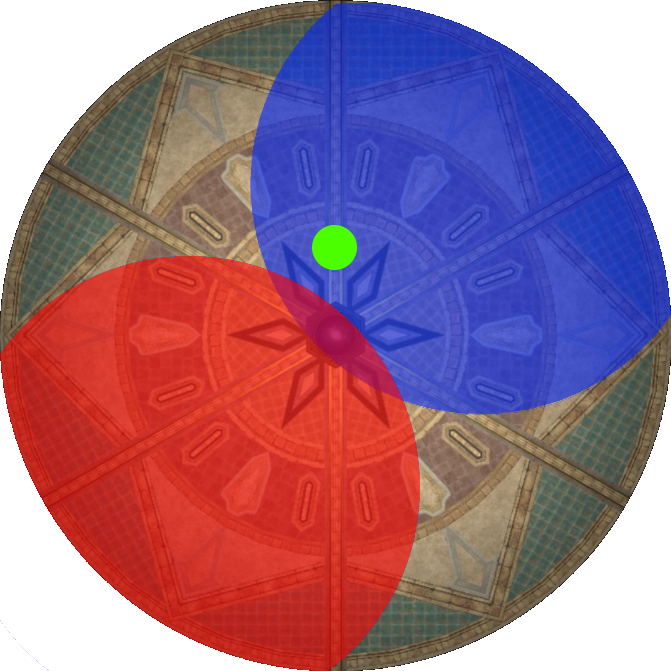
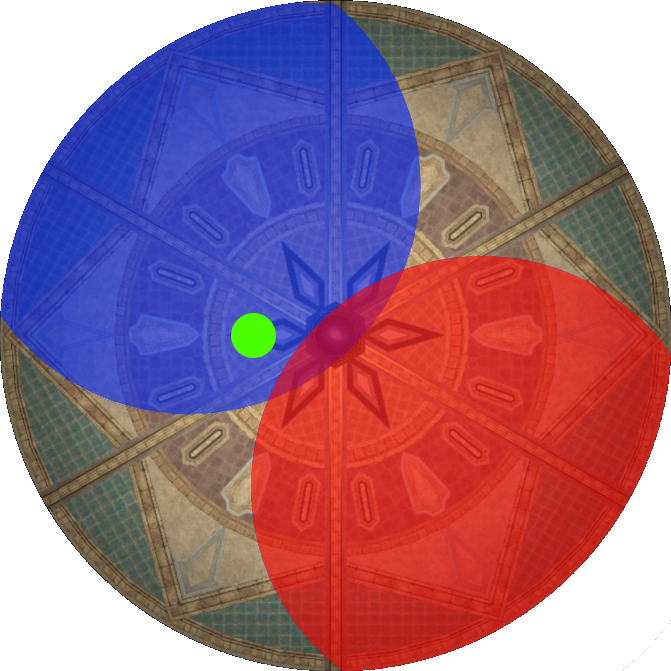
The following table displays where to stand, and the resulting temperature after each jump.
These positions have been optimized to minimize movement allowing DPS uptime.
Recommended distance: Outer edge target hitbox.
| Jump 1 | Jump 2 | Jump 3 | Jump 4 | |
|---|---|---|---|---|
| Visual | 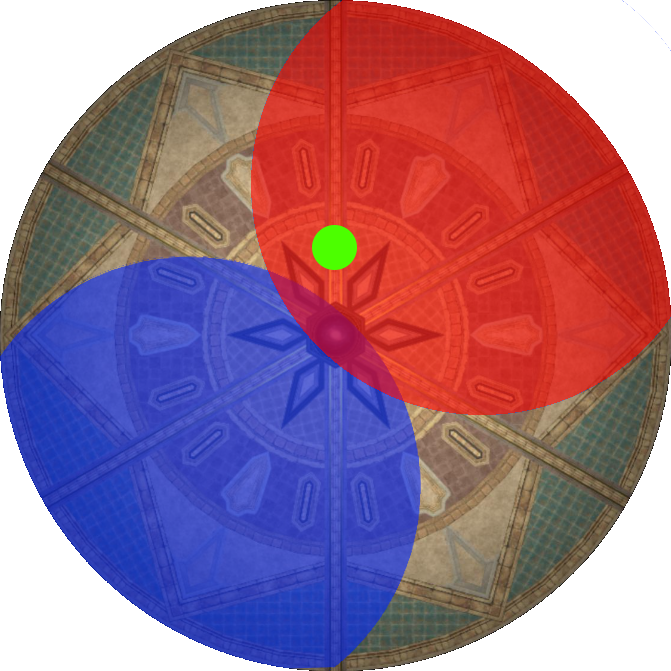 |
 |
 |
 |
| Position | Up | Up | Up | Left |
| Hit by | Fire | Ice | Fire | Nothing |
| Result | Neutral | Ice +1 | Neutral | Neutral |
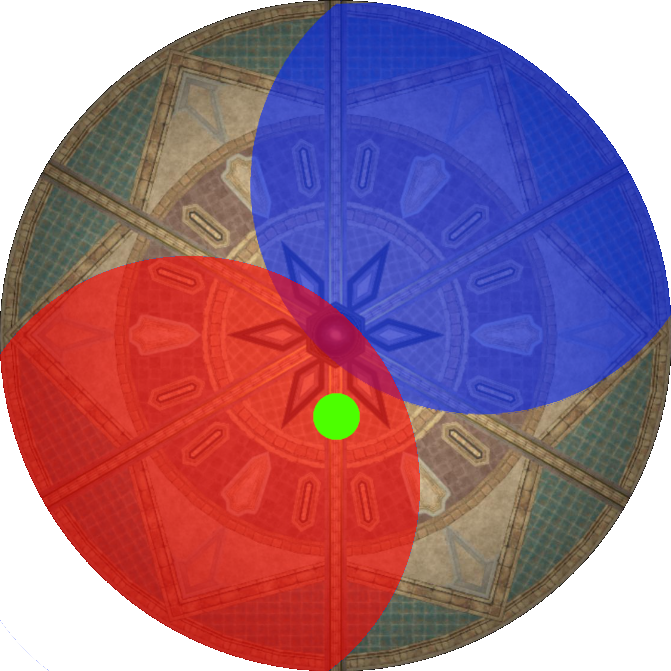
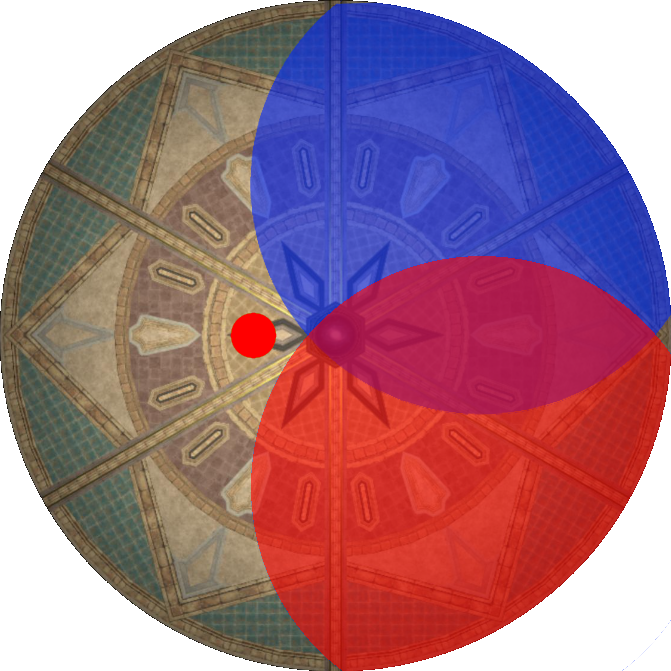
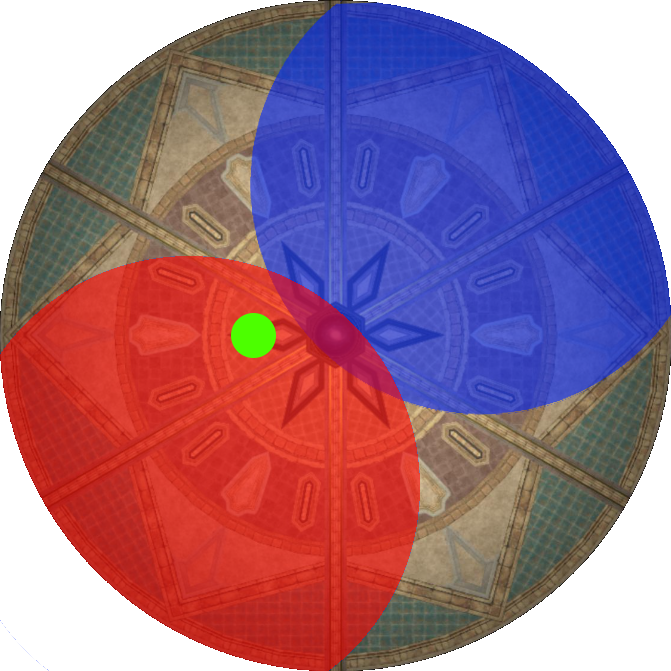
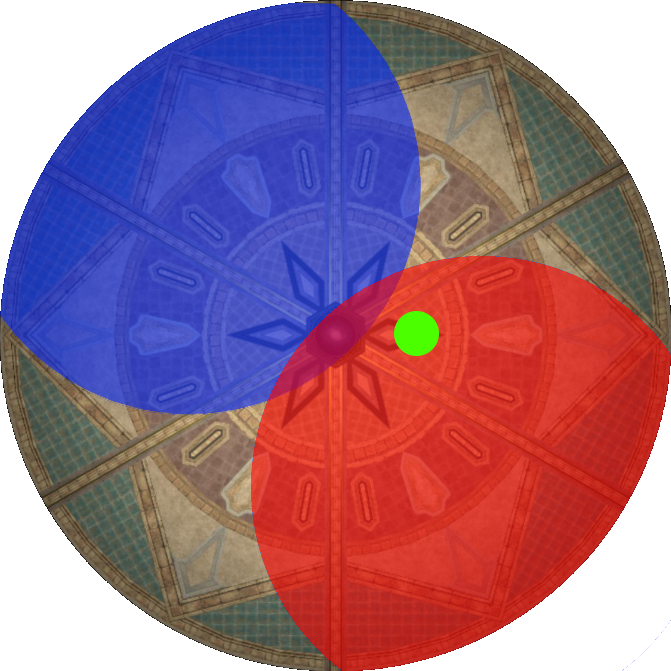
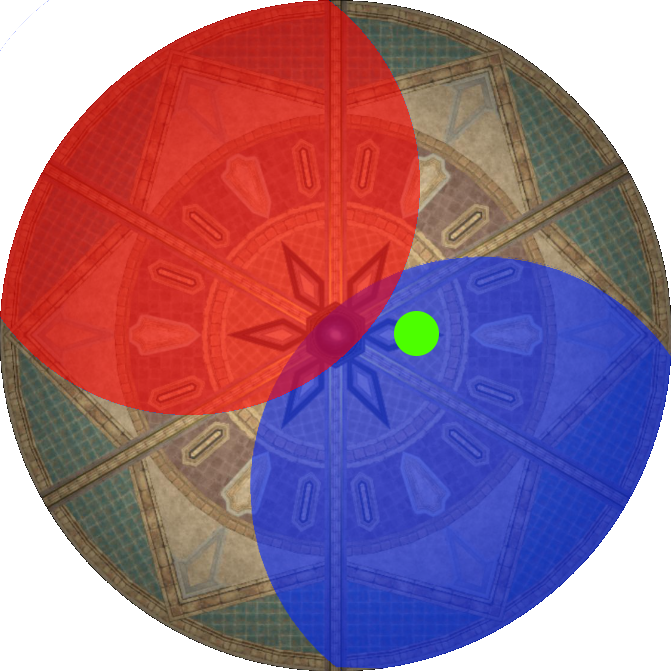
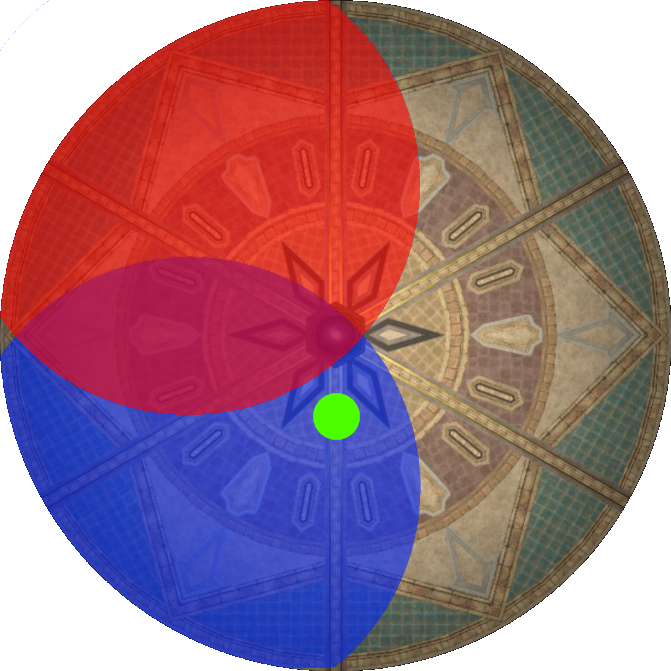
The following table displays where to stand, and the resulting temperature after each jump.
These positions have been optimized to minimize movement allowing DPS uptime.
Recommended distance: Outer edge target hitbox.
| Jump 1 | Jump 2 | Jump 3 | Jump 4 | |
|---|---|---|---|---|
| Visual | 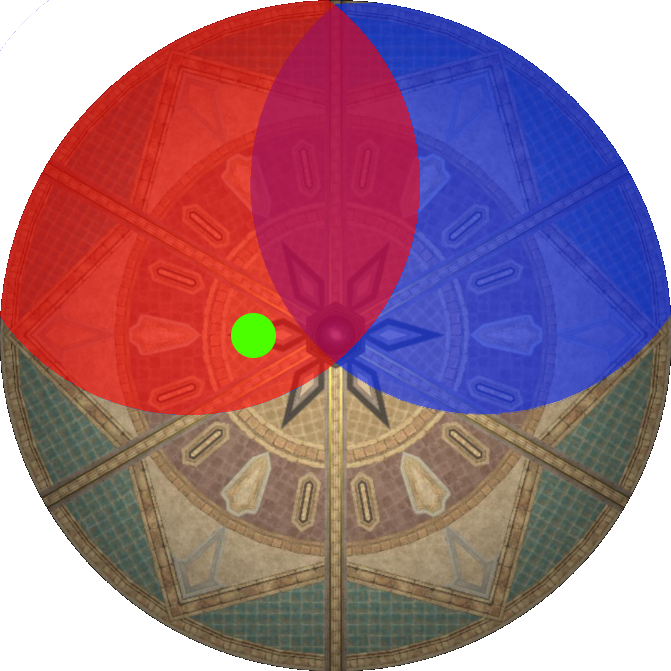 |
|
 |
 |
| Position | Left | Up | Up | Up |
| Hit by | Fire | Ice | Fire | Nothing |
| Result | Neutral | Ice +1 | Neutral | Neutral |
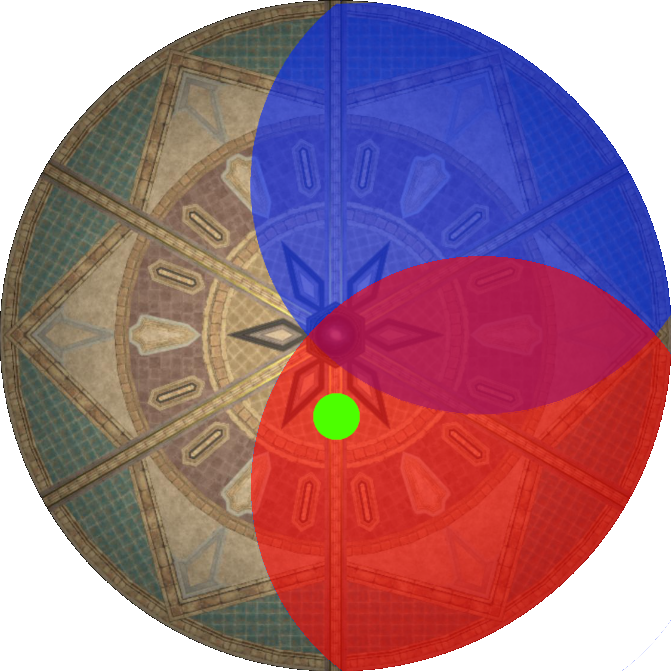
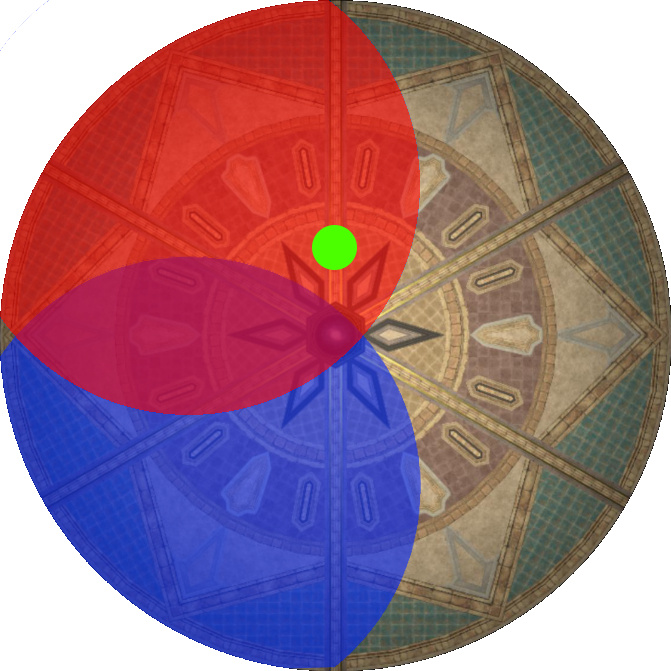
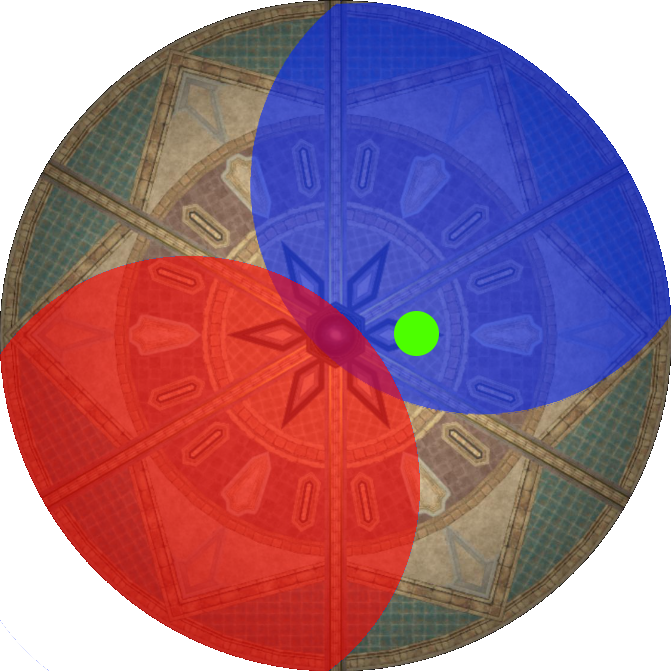
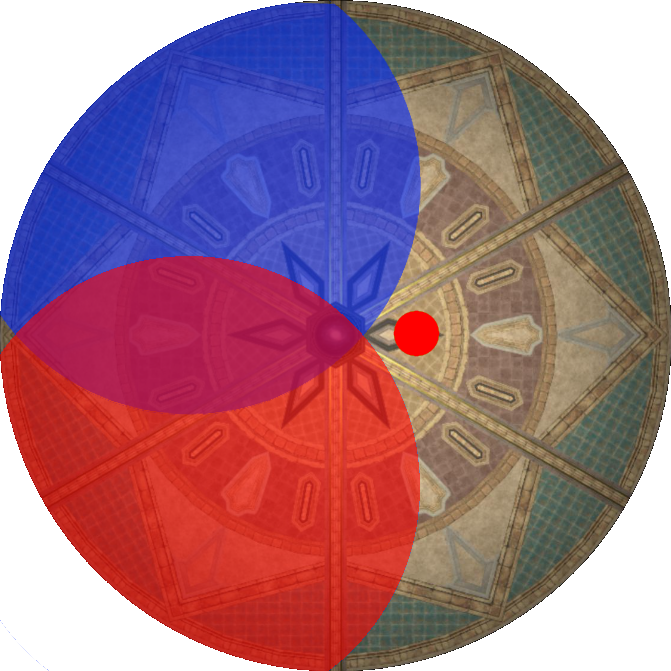
The following table displays where to stand, and the resulting temperature after each jump.
These positions have been optimized to minimize movement allowing DPS uptime.
Recommended distance: Outer edge target hitbox.
| Jump 1 | Jump 2 | Jump 3 | Jump 4 | |
|---|---|---|---|---|
| Visual | 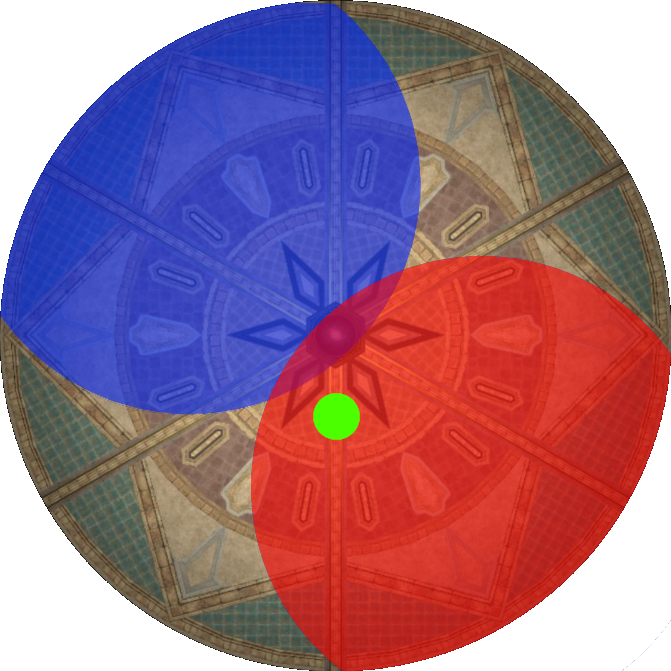 |
 |
|
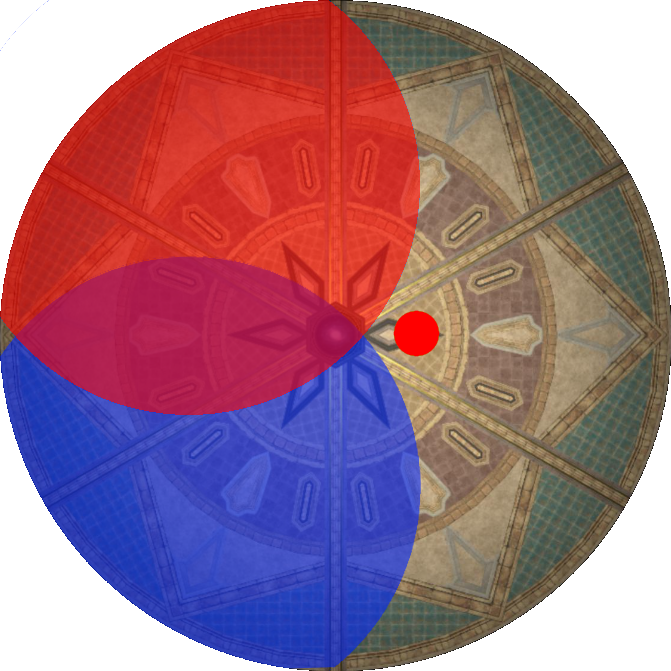 |
| Position | Down | Down | Down | Right |
| Hit by | Fire | Ice | Fire | Nothing |
| Result | Neutral | Ice +1 | Neutral | Neutral |
The following table displays where to stand, and the resulting temperature after each jump.
These positions have been optimized to minimize movement allowing DPS uptime.
Recommended distance: Outer edge target hitbox.
| Jump 1 | Jump 2 | Jump 3 | Jump 4 | |
|---|---|---|---|---|
| Visual | 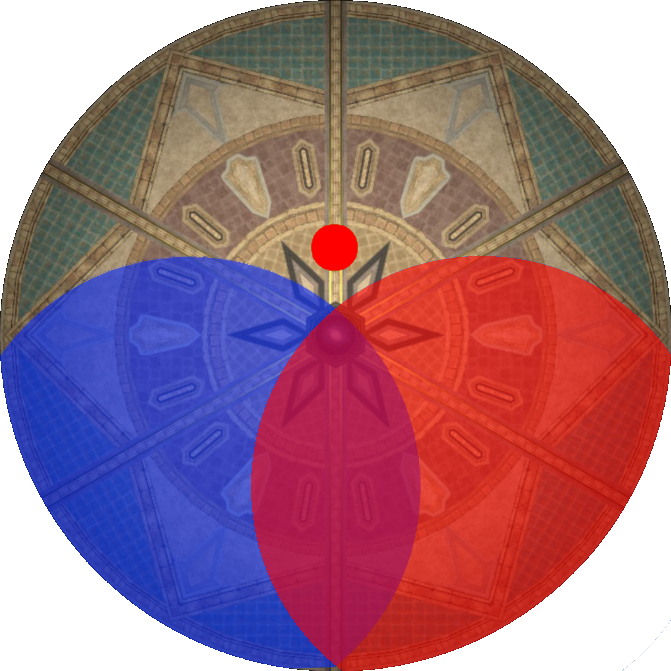 |
 |
 |
|
| Position | Up | Left | Left | Down |
| Hit by | Nothing | Fire | Fire | Nothing |
| Result | Ice +2 | Ice +1 | Neutral | Neutral |
The following table displays where to stand, and the resulting temperature after each jump.
These positions have been optimized to minimize movement allowing DPS uptime.
Recommended distance: Outer edge target hitbox.
| Jump 1 | Jump 2 | Jump 3 | Jump 4 | |
|---|---|---|---|---|
| Visual | |
|
|
 |
| Position | Up | Up | Up | Down |
| Hit by | Fire | Ice | Fire | Fire |
| Result | Ice +1 | Ice +2 | Ice +1 | Neutral |
The following table displays where to stand, and the resulting temperature after each jump.
These positions have been optimized to minimize movement allowing DPS uptime.
Recommended distance: Outer edge target hitbox.
| Jump 1 | Jump 2 | Jump 3 | Jump 4 | |
|---|---|---|---|---|
| Visual | 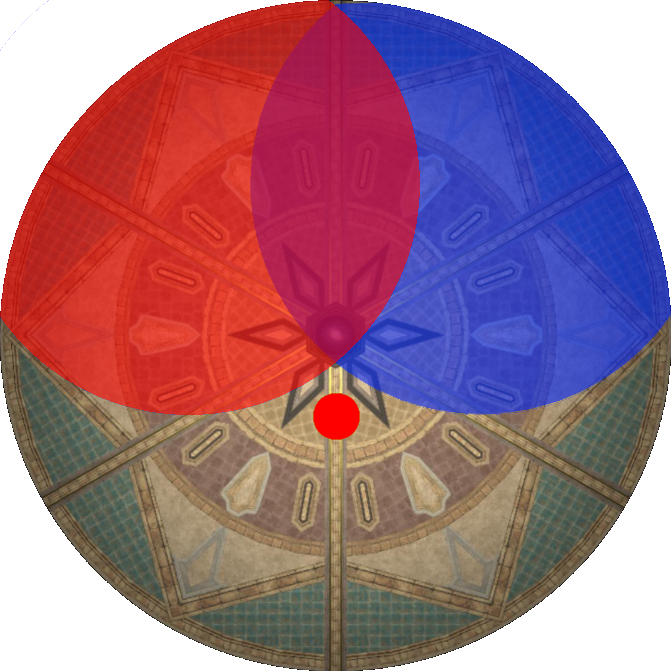 |
 |
 |
|
| Position | Down | Right | Right | Up |
| Hit by | Nothing | Fire | Fire | Nothing |
| Result | Ice +2 | Ice +1 | Neutral | Neutral |
The following table displays where to stand, and the resulting temperature after each jump.
These positions have been optimized to minimize movement allowing DPS uptime.
Recommended distance: Outer edge target hitbox.
| Jump 1 | Jump 2 | Jump 3 | Jump 4 | |
|---|---|---|---|---|
| Visual | |
|
|
 |
| Position | Down | Down | Down | Up |
| Hit by | Fire | Ice | Fire | Fire |
| Result | Ice +1 | Ice +2 | Ice +1 | Neutral |
The following table displays where to stand, and the resulting temperature after each jump.
These positions have been optimized to minimize movement allowing DPS uptime.
Recommended distance: Outer edge target hitbox.
| Jump 1 | Jump 2 | Jump 3 | Jump 4 | |
|---|---|---|---|---|
| Visual | |
|
|
|
| Position | Right | Left | Left | Down |
| Hit by | Fire | Fire | Fire | Nothing |
| Result | Ice +2 | Ice +1 | Neutral | Neutral |
The following table displays where to stand, and the resulting temperature after each jump.
These positions have been optimized to minimize movement allowing DPS uptime.
Recommended distance: Outer edge target hitbox.
| Jump 1 | Jump 2 | Jump 3 | Jump 4 | |
|---|---|---|---|---|
| Visual | |
 |
|
|
| Position | Right | Down | Left | Left |
| Hit by | Fire | Fire | Fire | Nothing |
| Result | Ice +2 | Ice +1 | Neutral | Neutral |
The following table displays where to stand, and the resulting temperature after each jump.
These positions have been optimized to minimize movement allowing DPS uptime.
Recommended distance: Outer edge target hitbox.
| Jump 1 | Jump 2 | Jump 3 | Jump 4 | |
|---|---|---|---|---|
| Visual | |
|
|
|
| Position | Left | Right | Right | Up |
| Hit by | Fire | Fire | Fire | Nothing |
| Result | Ice +2 | Ice +1 | Neutral | Neutral |
The following table displays where to stand, and the resulting temperature after each jump.
These positions have been optimized to minimize movement allowing DPS uptime.
Recommended distance: Outer edge target hitbox.
| Jump 1 | Jump 2 | Jump 3 | Jump 4 | |
|---|---|---|---|---|
| Visual | |
 |
|
|
| Position | Right | Up | Left | Right |
| Hit by | Fire | Fire | Fire | Nothing |
| Result | Ice +2 | Ice +1 | Neutral | Neutral |
The following table displays where to stand, and the resulting temperature after each jump.
These positions have been optimized to minimize movement allowing DPS uptime.
Recommended distance: Outer edge target hitbox.
| Jump 1 | Jump 2 | Jump 3 | Jump 4 | |
|---|---|---|---|---|
| Visual | 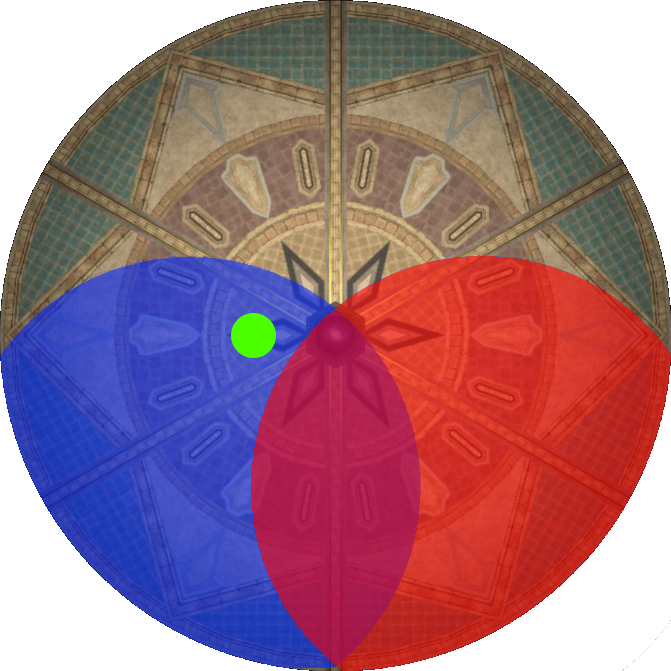 |
|
|
|
| Position | Left | Down | Down | Down |
| Hit by | Ice | Ice | Fire | Nothing |
| Result | Neutral | Ice +1 | Neutral | Neutral |
The following table displays where to stand, and the resulting temperature after each jump.
These positions have been optimized to minimize movement allowing DPS uptime.
Recommended distance: Outer edge target hitbox.
| Jump 1 | Jump 2 | Jump 3 | Jump 4 | |
|---|---|---|---|---|
| Visual | 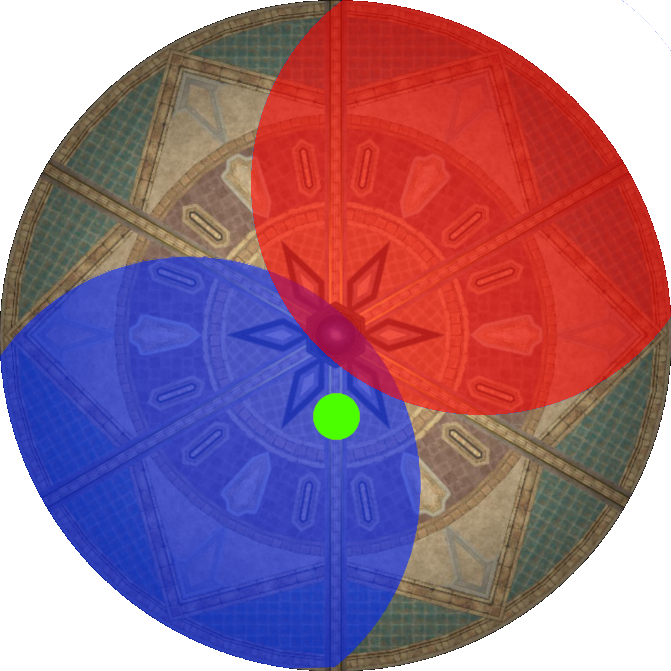 |
|
|
|
| Position | Down | Down | Down | Left |
| Hit by | Ice | Fire | Ice | Nothing |
| Result | Neutral | Fire +1 | Neutral | Neutral |
The following table displays where to stand, and the resulting temperature after each jump.
These positions have been optimized to minimize movement allowing DPS uptime.
Recommended distance: Outer edge target hitbox.
| Jump 1 | Jump 2 | Jump 3 | Jump 4 | |
|---|---|---|---|---|
| Visual | 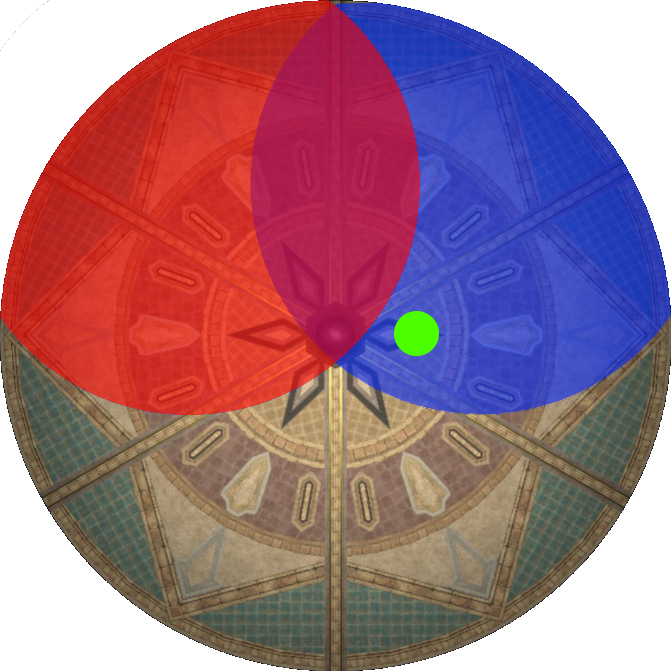 |
|
|
|
| Position | Right | Up | Up | Up |
| Hit by | Ice | Fire | Ice | Nothing |
| Result | Neutral | Fire +1 | Neutral | Neutral |
The following table displays where to stand, and the resulting temperature after each jump.
These positions have been optimized to minimize movement allowing DPS uptime.
Recommended distance: Outer edge target hitbox.
| Jump 1 | Jump 2 | Jump 3 | Jump 4 | |
|---|---|---|---|---|
| Visual | |
|
 |
|
| Position | Up | Up | Up | Right |
| Hit by | Ice | Fire | Ice | Nothing |
| Result | Neutral | Fire +1 | Neutral | Neutral |
The following table displays where to stand, and the resulting temperature after each jump.
These positions have been optimized to minimize movement allowing DPS uptime.
Recommended distance: Outer edge target hitbox.
| Jump 1 | Jump 2 | Jump 3 | Jump 4 | |
|---|---|---|---|---|
| Visual | |
 |
 |
|
| Position | Up | Right | Right | Down |
| Hit by | Nothing | Ice | Ice | Nothing |
| Result | Fire +2 | Fire +1 | Neutral | Neutral |
The following table displays where to stand, and the resulting temperature after each jump.
These positions have been optimized to minimize movement allowing DPS uptime.
Recommended distance: Outer edge target hitbox.
| Jump 1 | Jump 2 | Jump 3 | Jump 4 | |
|---|---|---|---|---|
| Visual | |
|
|
 |
| Position | Down | Down | Down | Up |
| Hit by | Ice | Fire | Ice | Ice |
| Result | Fire +1 | Fire +2 | Fire +1 | Neutral |
The following table displays where to stand, and the resulting temperature after each jump.
These positions have been optimized to minimize movement allowing DPS uptime.
Recommended distance: Outer edge target hitbox.
| Jump 1 | Jump 2 | Jump 3 | Jump 4 | |
|---|---|---|---|---|
| Visual | |
|
 |
|
| Position | Down | Down | Left | Up |
| Hit by | Nothing | Ice | Ice | Nothing |
| Result | Fire +2 | Fire +1 | Neutral | Neutral |
The following table displays where to stand, and the resulting temperature after each jump.
These positions have been optimized to minimize movement allowing DPS uptime.
Recommended distance: Outer edge target hitbox.
| Jump 1 | Jump 2 | Jump 3 | Jump 4 | |
|---|---|---|---|---|
| Visual | |
|
|
 |
| Position | Up | Up | Up | Down |
| Hit by | Ice | Fire | Ice | Ice |
| Result | Fire +1 | Fire +2 | Fire +1 | Neutral |
The following table displays where to stand, and the resulting temperature after each jump.
These positions have been optimized to minimize movement allowing DPS uptime.
Recommended distance: Outer edge target hitbox.
| Jump 1 | Jump 2 | Jump 3 | Jump 4 | |
|---|---|---|---|---|
| Visual | |
|
|
|
| Position | Left | Right | Right | Down |
| Hit by | Ice | Ice | Ice | Nothing |
| Result | Fire +2 | Fire +1 | Neutral | Neutral |
The following table displays where to stand, and the resulting temperature after each jump.
These positions have been optimized to minimize movement allowing DPS uptime.
Recommended distance: Outer edge target hitbox.
| Jump 1 | Jump 2 | Jump 3 | Jump 4 | |
|---|---|---|---|---|
| Visual | |
 |
|
|
| Position | Down | Right | Right | Up |
| Hit by | Ice | Nothing | Ice | Ice |
| Result | Fire +2 | Fire +2 | Fire +1 | Neutral |
The following table displays where to stand, and the resulting temperature after each jump.
These positions have been optimized to minimize movement allowing DPS uptime.
Recommended distance: Outer edge target hitbox.
| Jump 1 | Jump 2 | Jump 3 | Jump 4 | |
|---|---|---|---|---|
| Visual | |
 |
|
|
| Position | Right | Left | Left | Up |
| Hit by | Ice | Ice | Ice | Nothing |
| Result | Fire +2 | Fire +1 | Neutral | Neutral |
The following table displays where to stand, and the resulting temperature after each jump.
These positions have been optimized to minimize movement allowing DPS uptime.
Recommended distance: Outer edge target hitbox.
| Jump 1 | Jump 2 | Jump 3 | Jump 4 | |
|---|---|---|---|---|
| Visual | |
|
|
|
| Position | Left | Down | Right | Right |
| Hit by | Ice | Ice | Ice | Nothing |
| Result | Fire +2 | Fire +1 | Neutral | Neutral |